| Oracle® Database 2 Day + .NET Developer's Guide 11g Release 2 (11.2) Part Number E10767-01 |
|
|
View PDF |
| Oracle® Database 2 Day + .NET Developer's Guide 11g Release 2 (11.2) Part Number E10767-01 |
|
|
View PDF |
This chapter contains:
Overview: Building an ASP.NET Application with Oracle Developer Tools
Enabling Oracle Providers for ASP.NET and Creating a Lightweight Web User
Oracle integrates directly with Microsoft ASP.NET in a number of ways:
Oracle Developer Tools for Visual Studio provides an easy way to design data-driven web sites.
ODP.NET enables ASP.NET data access.
Oracle Providers for ASP.NET integrate directly with Microsoft ASP.NET controls and services to provide state management capabilities for web sites.
This tutorial demonstrates some of these features, including how to build a data-driven web application using Oracle Developer Tools and how to add security to that application in a simple manner using Oracle Providers for ASP.NET.
First, you will use the tools to build a web application that retrieves employee data from the Oracle database into a data grid. Then, you add a login control and secure the application by permitting only authorized web users access to this employee information. Finally, you create authorized web users using Oracle Providers for ASP.NET. These web users are stored within the Oracle database for authentication by this application.
Before you can build an ASP.NET application with Oracle Developer Tools, you may need to perform the setups described in the following sections:
If you are planning to use web site authentication, as described in "Enabling a Web Site for Authentication", you must perform the following setups:.
This section shows you how to create an ASP.NET web site that retrieves data from an Oracle database. The web site will display data in an ASP.NET GridView, allowing users to page through the results.
This section contains two topics:
To create an ASP.NET web site with a grid:
Start Visual Studio.
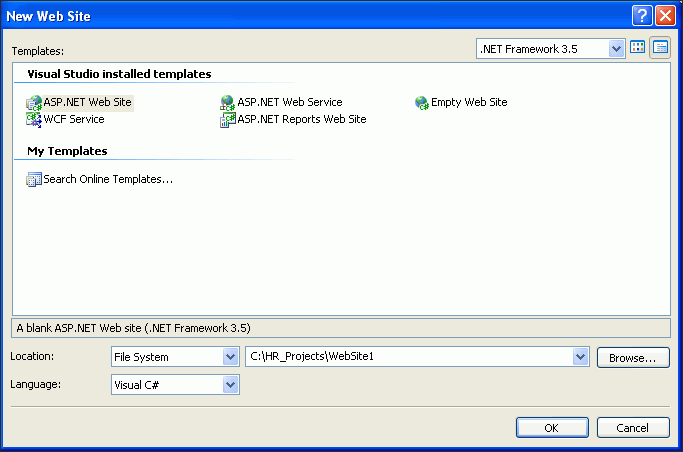
From the File menu, select New, then Web Site...

From New Web Site, select ASP.NET Web Site and enter or browse to the directory location for the web site. Click OK.
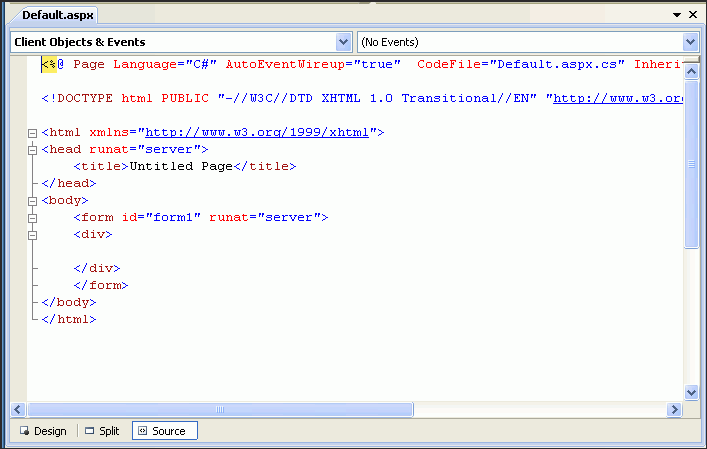
In the Default.aspx tab, click the Design icon at the bottom of the screen.
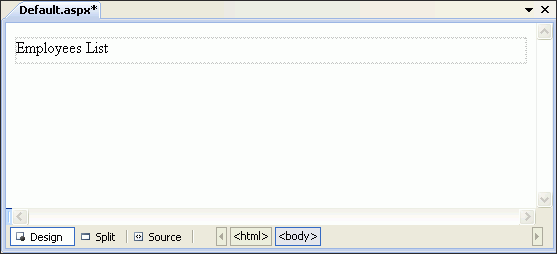
In the <div> element, which appears as a dotted rectangle, enter a title, such as Employees List.
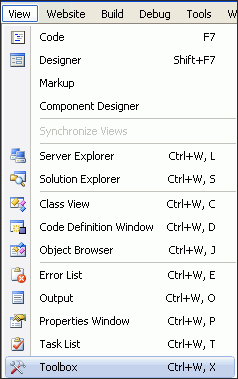
From the View menu, select Toolbox.
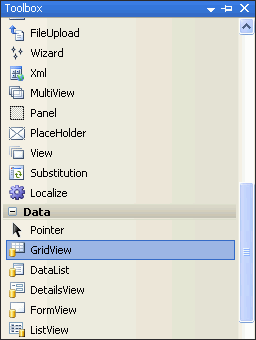
Expand the Data group and drag the GridView control into the dotted rectangle labeled <div> of the Designer
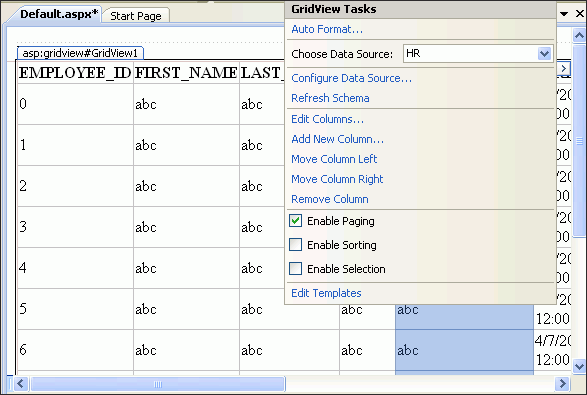
When a grid with dummy titles and contents appears, view the GridView Tasks list on the right.
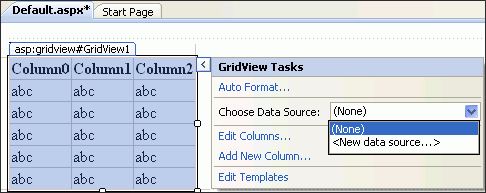
If you do not see the task list, select the grid, and then click the > symbol on the right.

Under the GridView Tasks, select <New data source...> from the Choose Data Source list, as shown in step 8 in the previous section.
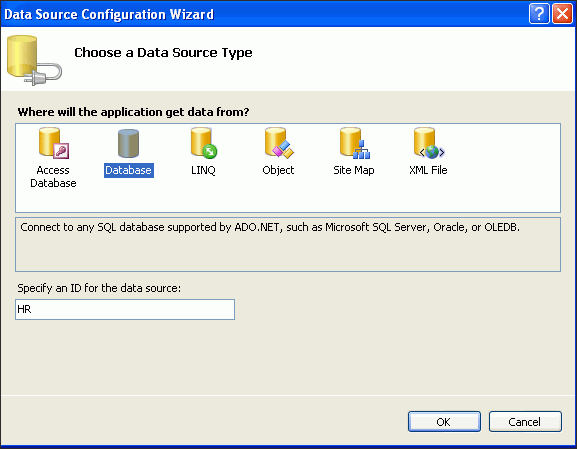
A Data Source Configuration wizard starts.
Select Database. Enter HR as the ID for the data source. Click OK.
Click the down arrow to choose HR.ORCL from the list. Click Next.
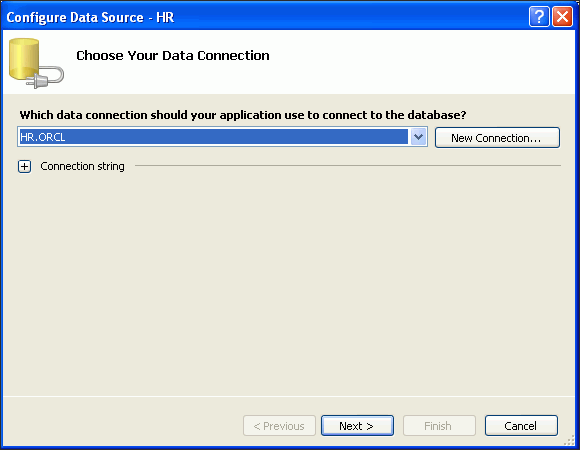
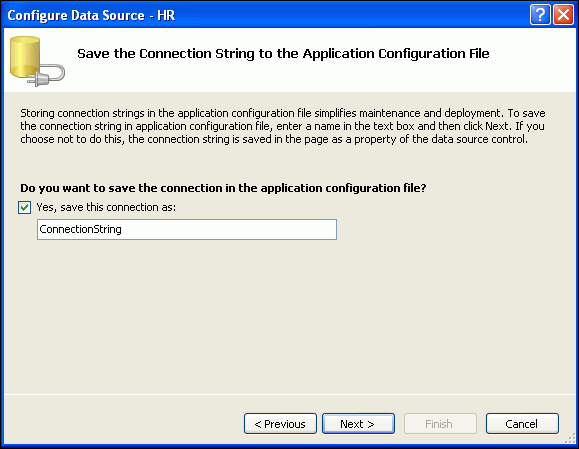
Click Next to save the connection string in the application configuration file.
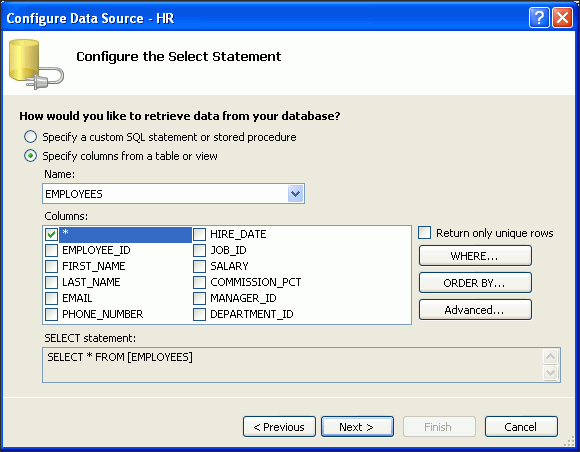
Select the EMPLOYEES table from the Name list. In the Columns list, check the box next to the asterisk ( *).
These selections tell Oracle to return all the rows from the EMPLOYEES table, just as if you had typed SELECT * FROM EMPLOYEES.
Click Next.
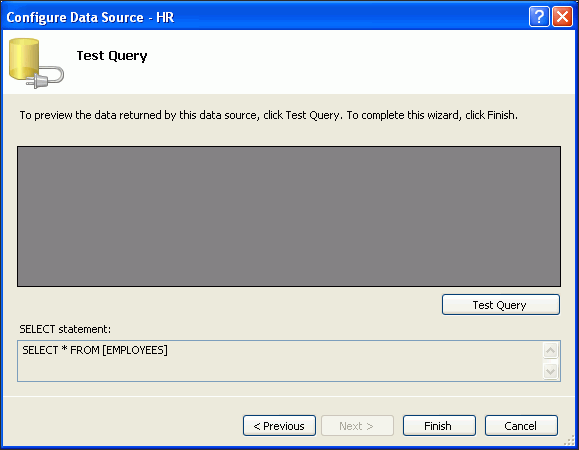
Click Test Query.
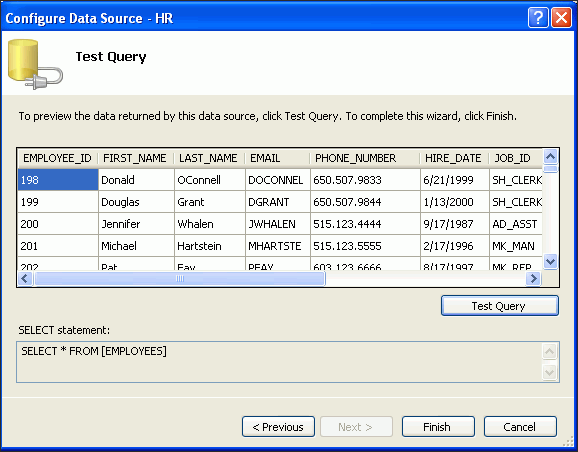
Click Finish when the Test Query results appear.
From the GridView Tasks, select Enable Paging. If you do not see the task list, select the grid, and then click the > symbol on the right. You may have to scroll right.
From the View menu, select Solution Explorer, and then select the web site. Right-click and select Build Web Site. The status bar will indicate success or failure.
From the View menu, select Debug, then Start Without Debugging.
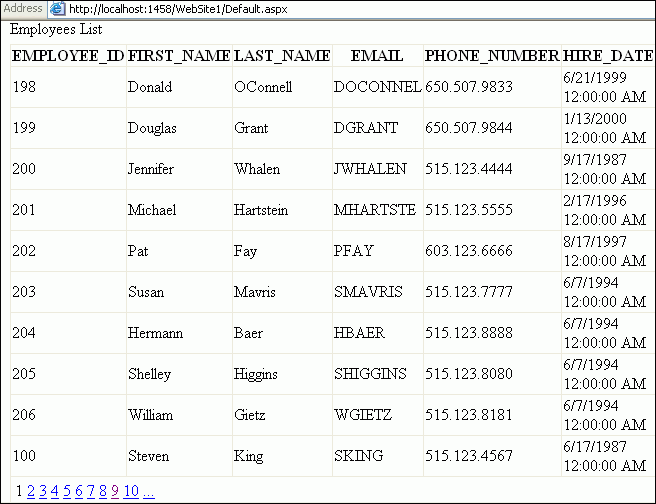
A browser window, such as the following, appears, showing the data requested by the query. You can page through the results using the numbers at the lower left section of the page.
Close the browser.
This section shows you how to add web site authentication to limit the users that can access the employee data. We will authenticate using an ASP.NET login control, verifying against users created and stored with the Oracle Providers for ASP.NET.
In the section following this, "Enabling Oracle Providers for ASP.NET and Creating a Lightweight Web User", you will take the ASP.NET application you have just built and secure the employee data so that an authorized user can access the information. You will create a web user for the application using Oracle Providers for ASP.NET. This web user starts the web application through the login control, and if the credentials are correct, can then access the employees information.
Reopen the web site you created in the previous section.
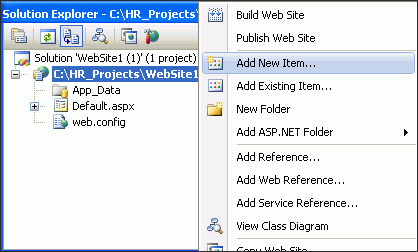
Select View, then Solution Explorer, and click the web site.
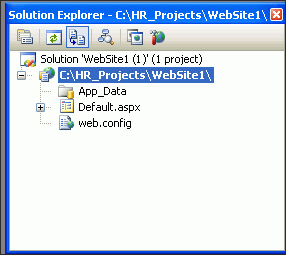
Right-click on the web site and Add New Item.
Select Web Form, enter the name login.aspx and click Add.
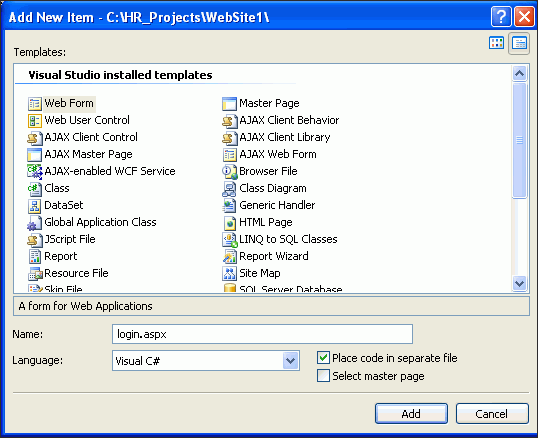
When the login.aspx page appears, switch to the Design tab.
From the View menu, open the Toolbox, expand the Login section, and drag and drop the login control onto the form, into the dotted rectangle labeled <div>.
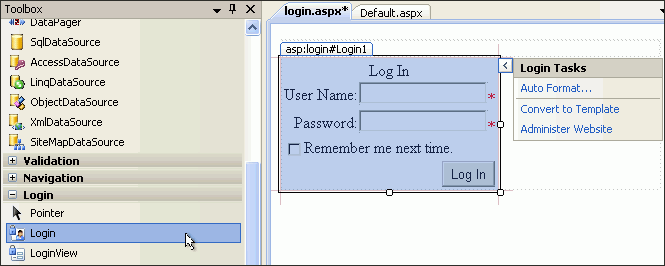
This is a standard ASP.NET login control, which can retrieve and verify user login credentials stored in the Oracle database.
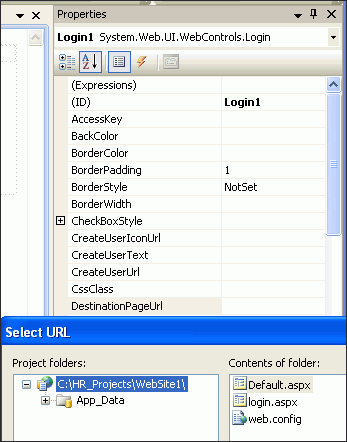
Right-click the login control and select Properties. For DestinationPageUrl, select or enter Default.aspx.
When a user successfully logs in, that user will be directed to the Default.aspx page, which contains the employee data. If a user does not successfully log in, they will be redirected back to the login page.
In this section, you will use the ASP.NET Web Site Administration Tool to do the following:
Direct the web site to use the Oracle ASP.NET providers.
Create a new web user specific to this web site, demonstrating the authentication features added to the site in "Enabling a Web Site for Authentication".
To direct the web site to use the Oracle ASP.NET providers and create new web site users, do the following:
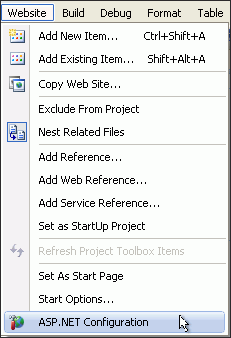
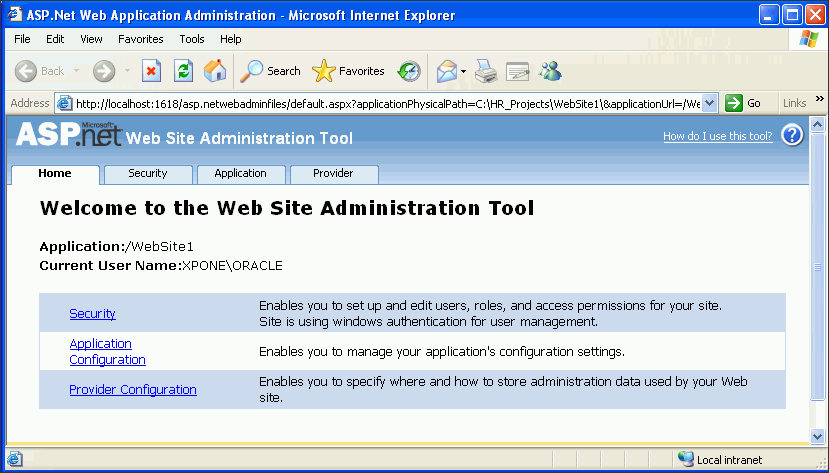
In Visual Studio, select Website, then ASP.NET Configuration.
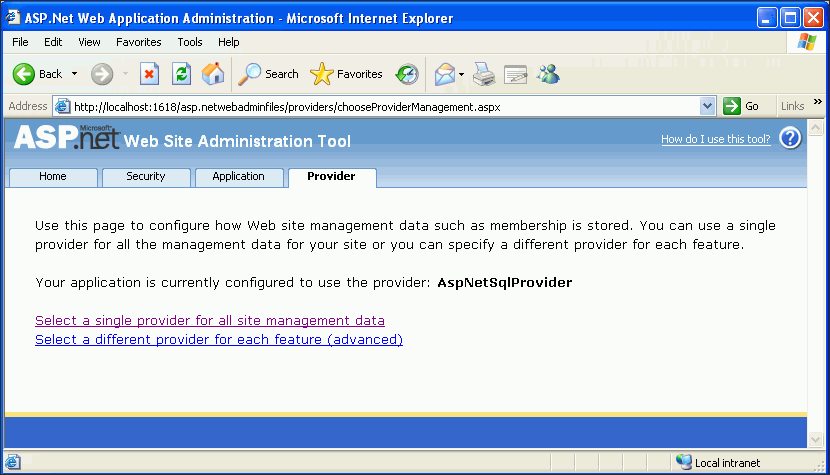
When the ASP.NET Web Site Administration Tool appears, select the Provider tab.
On the Provider page, select the second link: Select a different provider for each feature (advanced).
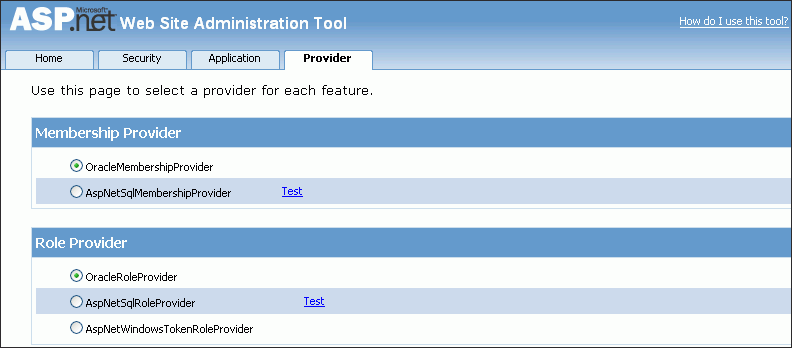
When the Provider page reappears, change the Membership Provider and Role Provider to the Oracle versions, if they are not selected.
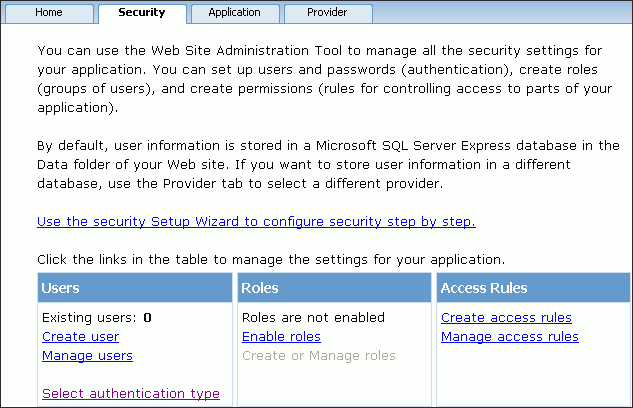
Go to the Security tab and under Users, click Select authentication type.
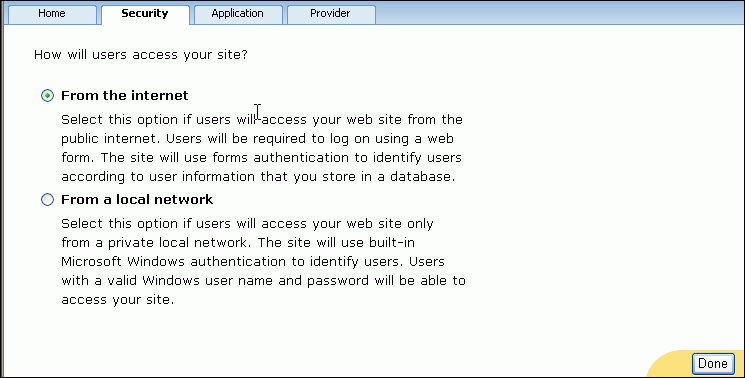
By default, the ASP.NET site uses Windows authentication to identify users. You are building a web site that will identify users by their site-specific logins and passwords. Therefore, the site must be configured to expect to use logins and passwords.
When the Security page reappears, choose From the internet and click Done.
When the security tab reappears with new links under Users, choose Create user.
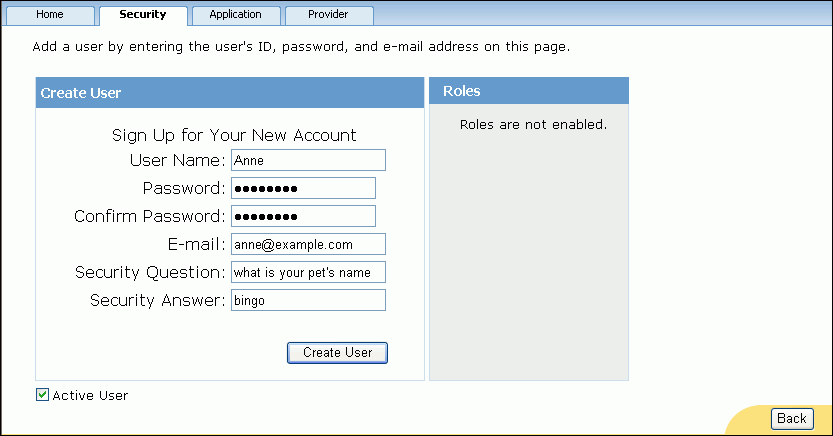
In the Create User section, enter the information for the user that you are allowing to enter the web site, as shown. Enter a password that contains at least 7 characters, including one non-alphanumeric character.
Click Create User.
When the Security page reappears, indicating that your account has been successfully completed, click the Security tab.
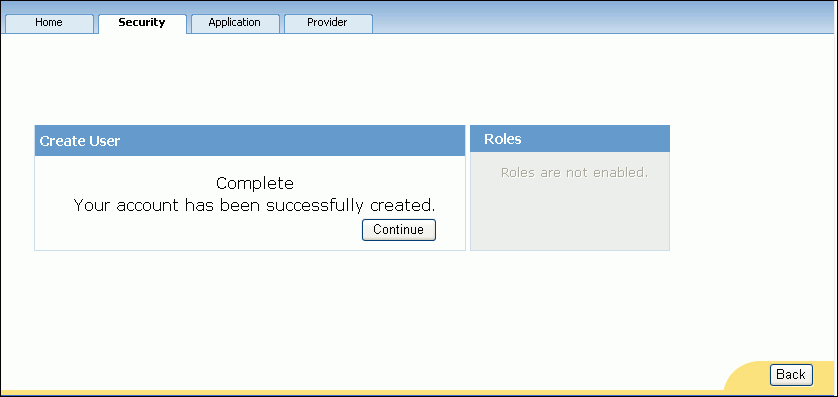
Note: Other options for this screen include continuing to create other users or going to a different tab.
When the main Security page reappears, under Access Rules, select Manage access rules.
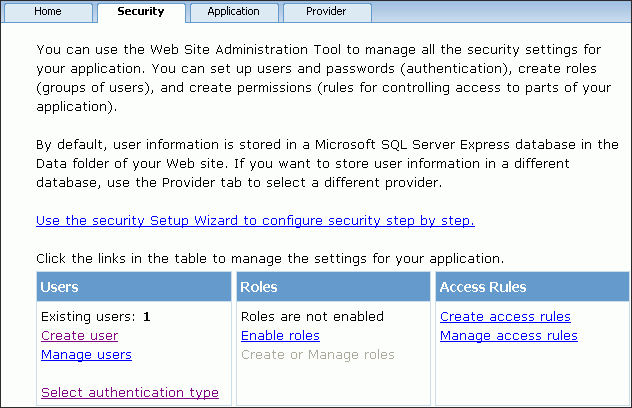
NOTE: Under Users, there is now one existing user.
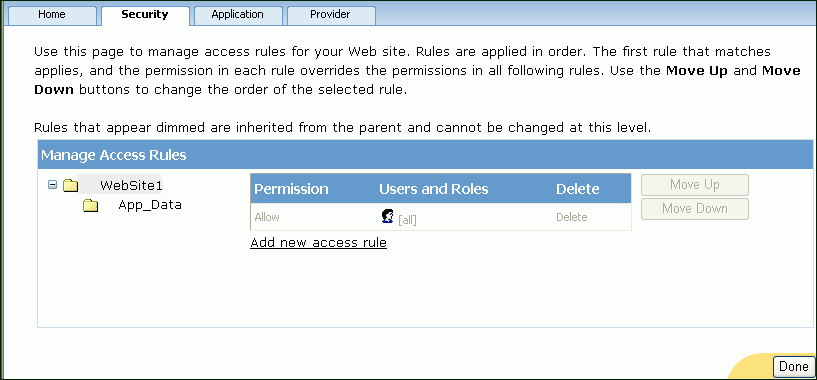
When the Manage Access Rules section on the Security tab appears, click on Add new access rule.
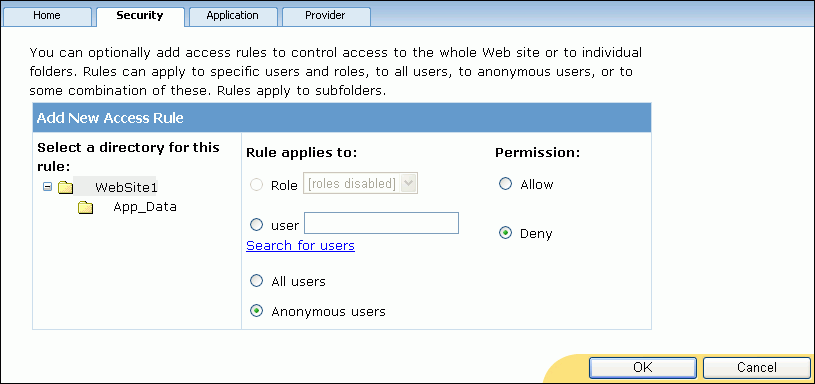
Select Anonymous users and Deny, then click OK.
By default, anonymous access to the web site is enabled. The above settings secure the web site by disabling anonymous access. Now, only authenticated users can view the employee data.
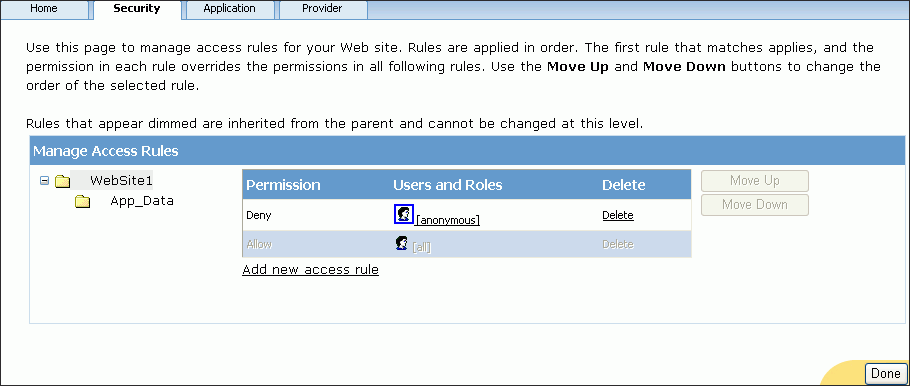
The Security page now indicates that the web site denies anonymous users access to the site.
Click Done.
Close the browser.
Now that you have created a web user specific to this web site, the web site will allow this user access to the employee data and deny access to all other users, including anonymous users.
In this section, you will attempt to access the employee data as an anonymous user, as an unauthorized user, as an authorized user with an incorrect password, and finally as an authorized user with the correct password. Only in the last scenario will the web site grant access to the employee data.
Note:
Five or more consecutive invalid passwords entered for an ASP.NET provider user within a ten minute period will lock the account to prevent unauthorized users from gaining access through password guessing. Oracle Membership Provider sets these security measures through the following properties, which you can modify in themachine.config file or web.config files: MaxInvalidPasswordAttempts (default: 5 attempts) and PasswordAttemptWindow (default: 10 minutes).
If the account is locked, then you can unlock the user by calling the UnlockUser method.
From the Debug menu, select Start Without Debugging, and when the login web page appears, change the URL to end with Default.aspx rather than login.aspx and press the enter key.
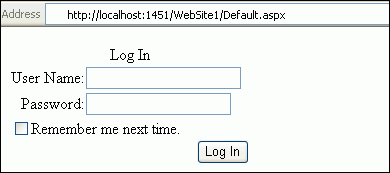
You are denied access and redirected back to the login page. This shows that anonymous users cannot browse the web site; only users with credentials have access.
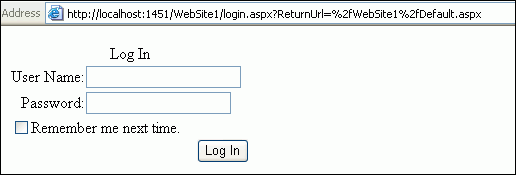
If you are experimenting with the authentication mechanism, you will likely repeat this step or try variations. For each variation, either start a new browser or clear the browser cache. Because browsers cache web pages, if you access Default.aspx again, you may see the cached version of this web page. This is not the intended behavior, rather the web page should undergo the ASP.NET provider authentication process, which is accomplished by using a new browser instance or clearing the browser cache.
Remove the text of the URL after login.aspx. This returns the URL back to the original state when you first accessed the site.
Enter the User Name Bob and a password that contains at least 7 characters, one of which is non-alphanumeric.
Click Log In.
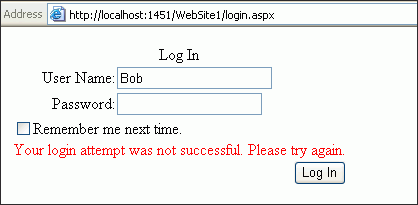
The page reappears with the message "Your login attempt was not successful. Please try again."
Bob is not an authorized user. The web site correctly denies access to the user.
Enter the user name Anne, but with an incorrect password for that web site user.
Click Log In.
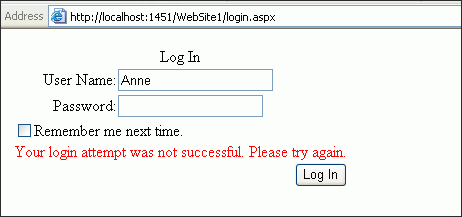
As the screen shot indicates, the user is denied access, demonstrating that the control could not verify this user's credentials with those stored by the Oracle Membership Provider.
Enter the correct password for the web site user.
Click Log In.
The employee data appears. This demonstrates that only authorized users can access the data. Thus, Oracle Providers for ASP.NET provided web site security in a very simple manner.
You have now built a data-driven ASP.NET web application. It performs authentication and retrieves employee data from the database.