| Oracle® Database 2 Day + PHP Developer's Guide 11g Release 2 (11.2) Part Number E10811-01 |
|
|
View PDF |
| Oracle® Database 2 Day + PHP Developer's Guide 11g Release 2 (11.2) Part Number E10811-01 |
|
|
View PDF |
This chapter shows you how to change the application to upload a JPEG image for new employee records and display it on the Employees page. It has the following topics:
In this section, you will modify your application code to enable a photo to be stored in the record of an employee.
To enable images of employees to be stored in the employee records, perform the following tasks:
Create the chap7 directory, copy the application files from chap6, and change to the newly created directory:
On Windows:
mkdir c:\program files\Apache Group\Apache2\htdocs\chap7
cd c:\program files\Apache Group\Apache2\htdocs\chap7
copy ..\chap6\* .
On Linux:
mkdir $HOME/public_html/chap7
cd $HOME/public_html/chap7
cp ../chap6/* .
Open SQL Developer and open a connection to your HR sample schema.
Login to your HR sample schema as hr.
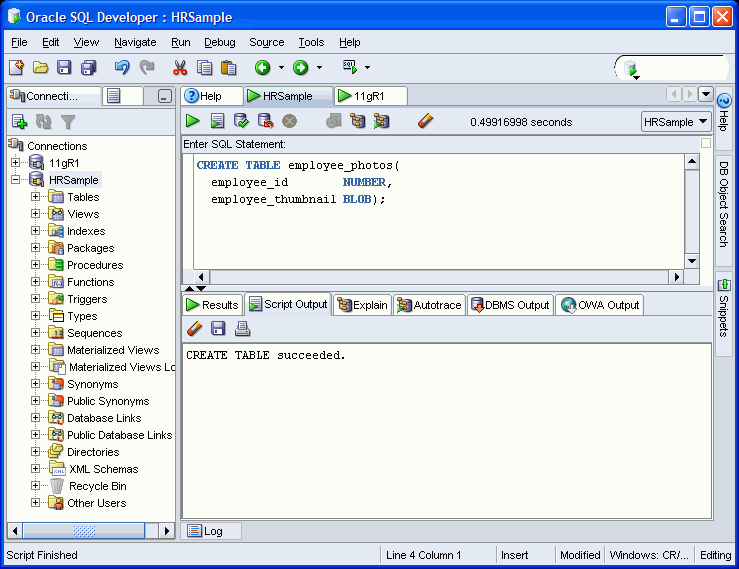
Open SQL Worksheet and enter the following CREATE TABLE statement to create a new table for storing employee images:
CREATE TABLE employee_photos(
  employee_id        NUMBER,
  employee_thumbnail BLOB);
The HR user must have the CREATE TABLE privilege to perform this command. If you get an "insufficient privileges" error message, then log out as the HR user, log in as system, and execute the following GRANT command:
GRANT create table TO hr;
Then log in as HR again to execute the CREATE TABLE statement.
Edit the anyco_ui.inc file. Add a Photograph column to the EMPLOYEES table in the ui_print_employees() function:
<th>Commission<br>(%)</th>
<th>Remuneration</th>
<th>Photograph</th>
The data for the Photograph column is populated with an <img> tag whose src attribute is defined as a URL reference to a new anyco_im.php file, which will display the image for each employee record.
Edit the anyco_ui.inc file. Add code in the ui_print_employees() function to generate an <img> tag referencing the anyco_im.php file with the employee identifier as a parameter:
echo '<td align="right">'
     .htmlentities($emp['REMUNERATION']).'</td>';
echo '<td><img src="anyco_im.php?showempphoto='.$emp['EMPLOYEE_ID']
     .'" alt="Employee photo"></td>';
Edit the anyco_ui.inc file. To enable images to be uploaded when a new employee record is created, add an enctype attribute to the <form> tag in the ui_print_insert_employee() function:
<form method="post" action="$posturl" enctype="multipart/form-data">
At the bottom of the form add an upload field with an input type of file:
<tr>
  <td>Commission (%)</td>
  <td><input type="text" name="commpct" value="0" size="20"></td>
</tr>
<tr>
  <td>Photo</td>
  <td><input type="file" name="empphoto"></td>
</tr>
Create the anyco_im.php file. This file accepts an employee identifier as a URL parameter, reads the image from the Photograph column for that employee record, and returns the thumbnail image to be displayed:
<?php    // anyco_im.php

require('anyco_cn.inc');
require('anyco_db.inc');
construct_image();

function construct_image()
{
  if (!isset($_GET['showempphoto'])) {
    return;
  }

  $empid = $_GET['showempphoto'];

  $conn = db_connect($err);

  if (!$conn) {
    return;
  }

  $query =
    'SELECT employee_thumbnail
     FROM   employee_photos
     WHERE  employee_id = :eid';

  $stid = oci_parse($conn, $query);
  $r = oci_bind_by_name($stid, ":eid", $empid, -1);
  if (!$r) {
    return;
  }
  $r = oci_execute($stid, OCI_DEFAULT);
  if (!$r) {
    return;
  }

  $arr = oci_fetch_row($stid);
  if (!$arr) {
    return;                     // photo not found
  }

  $result = $arr[0]->load();

  // If any text (or whitespace!) is printed before this header is sent,
  // the text is not displayed. The image also is not displayed properly.
  // Comment out the "header" line to see the text and debug.
  header("Content-type: image/JPEG");
  echo $result;
}

?>
The construct_image() function uses the OCI-Lob->load() function to retrieve the Oracle LOB data, which is the image data. The PHP header() function sets the MIME type in the HTTP response header to ensure the browser interprets the data as a JPEG image.
If you want to display other image types, then the Content-type needs to be changed accordingly.
Edit the anyco_db.inc file. Add a new function db_insert_thumbnail()to insert an image into the EMPLOYEE_PHOTOS table:
function db_insert_thumbnail($conn, $empid, $imgfile, &$e)
{
  $lob = oci_new_descriptor($conn, OCI_D_LOB);
  if (!$lob) {
    $e = db_error($conn, __FILE__, __LINE__);
    return false;
  }

  $insstmt =
    'INSERT INTO employee_photos (employee_id, employee_thumbnail)
     VALUES(:eid, empty_blob())
     RETURNING employee_thumbnail into :etn';

  $stmt = oci_parse($conn, $insstmt);
  $r = oci_bind_by_name($stmt, ':etn', $lob, -1, OCI_B_BLOB);
  if (!$r) {
    $e = db_error($stid, __FILE__, __LINE__);
    return false;
  }
  $r = oci_bind_by_name($stmt, ':eid', $empid, -1);
  if (!$r) {
    $e = db_error($stid, __FILE__, __LINE__);
    return false;
  }
  $r = oci_execute($stmt, OCI_DEFAULT);
  if (!$r) {
    $e = db_error($stid, __FILE__, __LINE__);
    return false;
  }

  if (!$lob->savefile($imgfile)) {
    $e = db_error($stid, __FILE__, __LINE__);
    return false;
  }
  $lob->free();

  return true;
}
To tie the new EMPLOYEE_PHOTOS and EMPLOYEES tables together, you must use the same employee id in both tables.
Edit the anyco_db.inc file. Change the $bindvars parameter in the db_execute_statement() function to &$bindvars so that OUT bind variable values are returned from the database. At the bottom of the function, add a loop to set any return bind values:
function db_execute_statement($conn, $statement, &$e, &$bindvars = array())
{
  ...
  $r = @oci_execute($stid);
  if (!$r) {
    $e = db_error($stid, __FILE__, __LINE__);
    return false;
  }
  $outbinds = array();
  foreach ($bindvars as $b) {
    $outbinds[$b[0]] = $$b[0];
  }
   $bindvars = $outbinds;
   return true;
}
Edit the anyco.php file. Change the INSERT statement in the insert_new_emp() function so that it returns the new employee identifier in the bind variable :neweid. This value is inserted with the image into the new EMPLOYEE_PHOTOS table.
$statement =
  'INSERT INTO employees
               (employee_id, first_name, last_name, email, hire_date,
               job_id, salary, commission_pct, department_id)
   VALUES (employees_seq.nextval, :fnm, :lnm, :eml, :hdt,
          :jid, :sal, :cpt, :did)
   RETURNING employee_id into :neweid';
Also in the insert_new_emp() function, add a call to the array_push() function to set a new bind variable NEWEID at the end of the list of array_push() calls:
array_push($bindargs, array('CPT', $newemp['commpct'], -1));
array_push($bindargs, array('DID', $newemp['deptid'], -1));
array_push($bindargs, array('NEWEID', null, 10));
Because the value of NEWID is being retrieved with the RETURNING clause in the INSERT statement, its initial value is set to NULL. The length is set to 10 to allow enough digits in the return value.
Edit the anyco.php file. In the insert_new_emp() function, add a call between the db_execute_statement() and construct_employees() calls to insert the thumbnail image:
$r = db_execute_statement($conn, $statement, $err, $bindargs);
if ($r) {
  $r = db_insert_thumbnail($conn, $bindargs['NEWEID'],
                           $_FILES['empphoto']['tmp_name'], $e);
  construct_employees();
}
In a browser, enter the following application URL:
On Windows:
http://localhost/chap7/anyco.php
On Linux:
http://localhost/~<username>/chap7/anyco.php
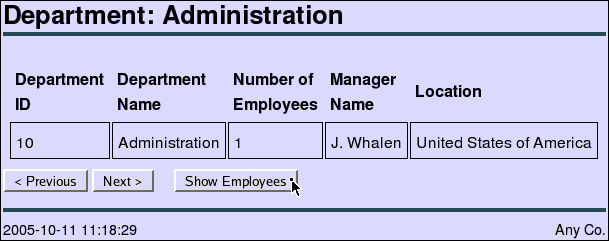
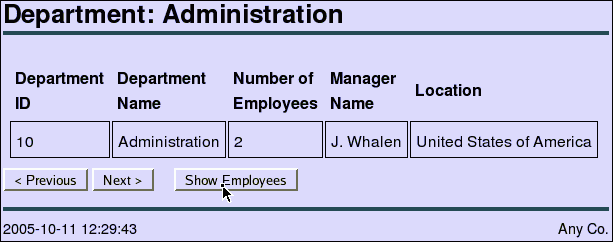
In the Departments page, click Show Employees to navigate to the Employees page:
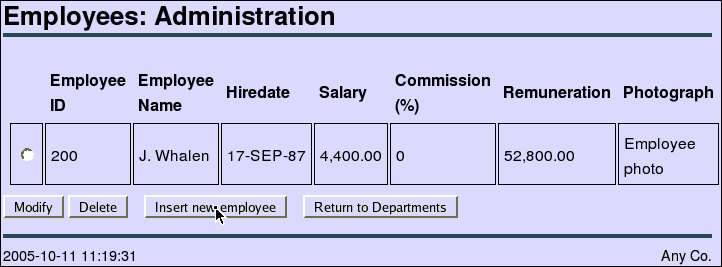
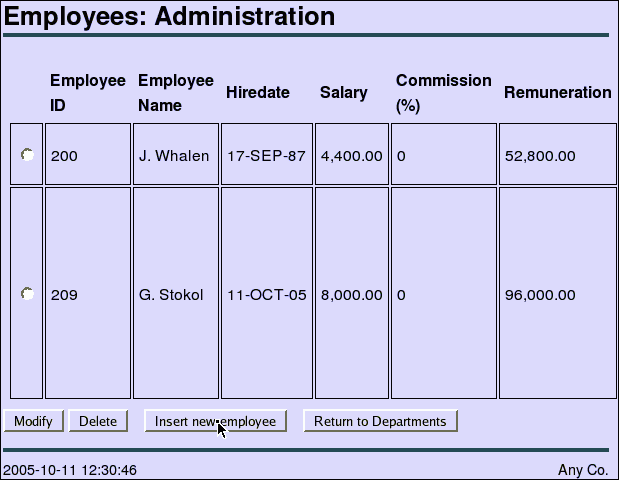
In the Employees page, to insert a new employee record click Insert new employee:
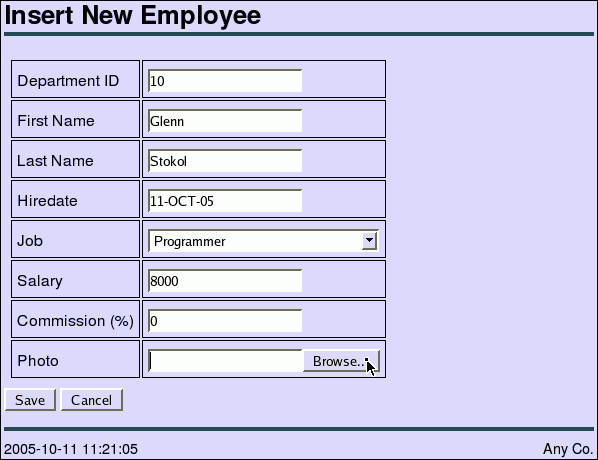
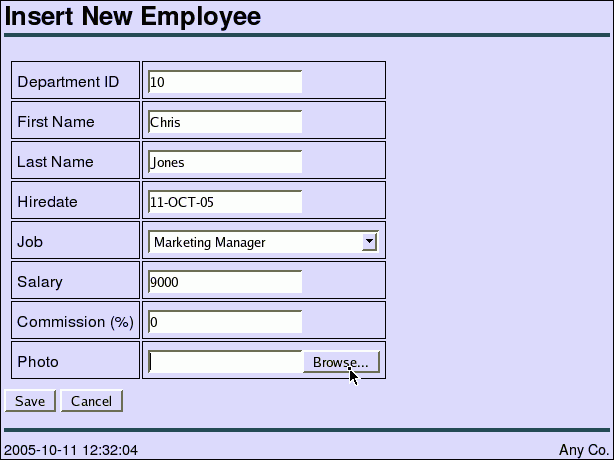
The Insert New Employee form allows you to choose a thumbnail image on your system to be uploaded to the database. Enter your own values in the fields or use the values as shown. Click Browse:
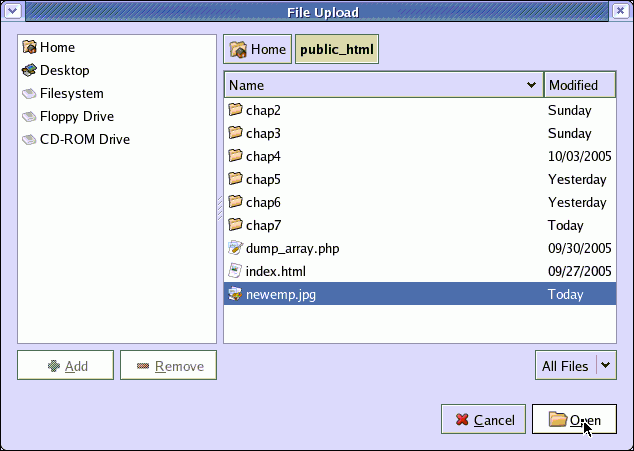
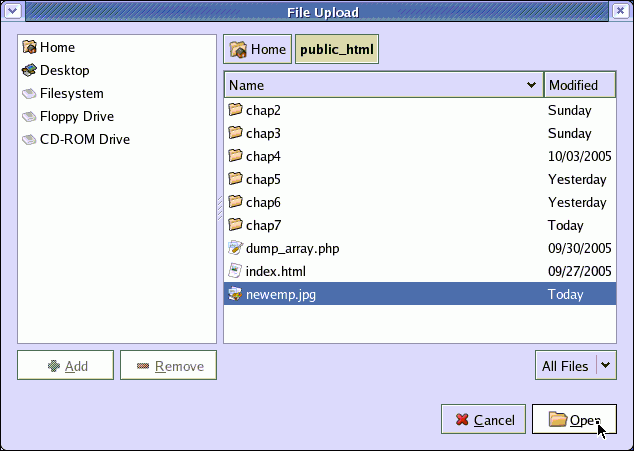
In the File Upload window, browse for and select a JPEG image file, and click Open:
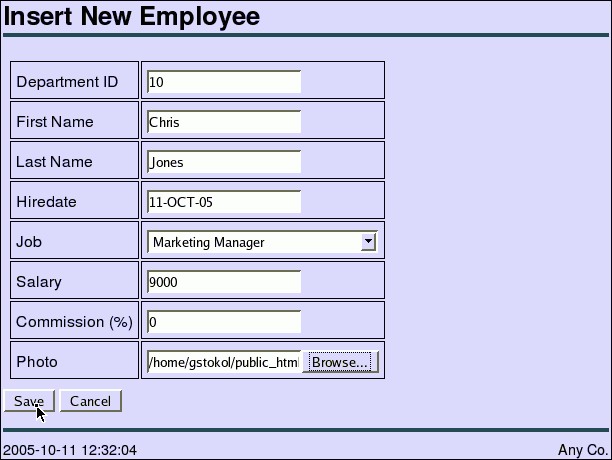
In the Insert New Employee page, click Save:
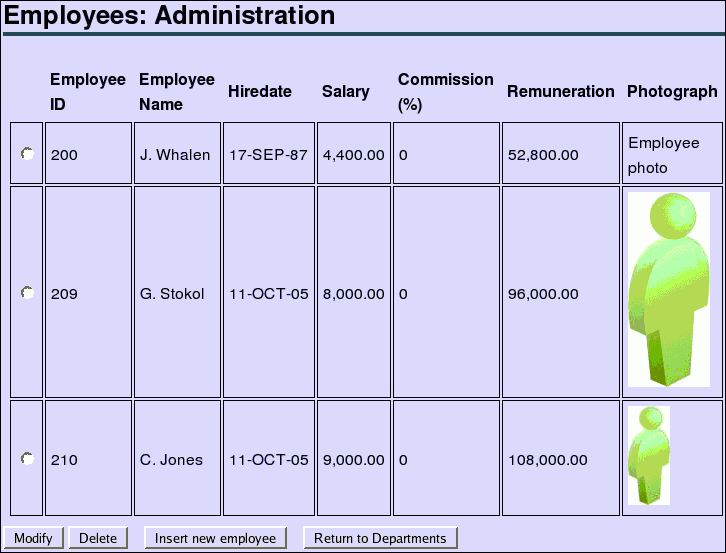
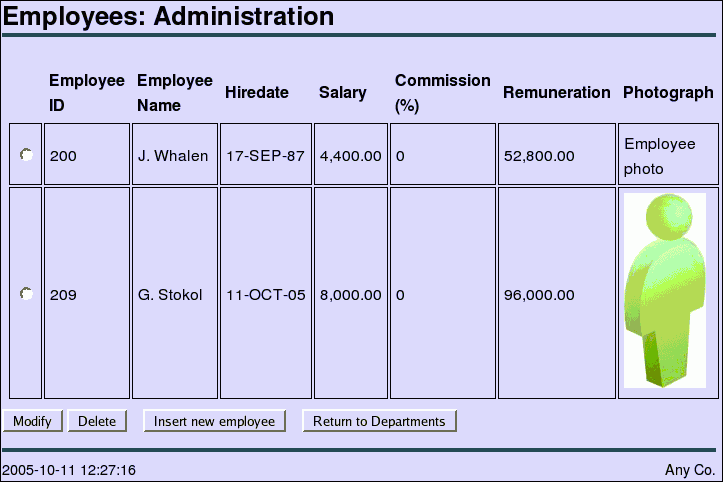
The Employees page is displayed with the new employee record, including the image, which is displayed at its original size:
In this section, you will further modify your application code to create a thumbnail image from a supplied image, and store the thumbnail image in the record of an employee.
You can use the PHP GD graphics extension to resize employee images.
Restart Apache. You can either use the ApacheMonitor utility, or you can use Windows Services.
To use the ApacheMonitor utility, navigate to the Apache bin directory and double click ApacheMonitor.exe. In a default installation, Apache bin is located at c:\Program Files\Apache Group\Apache2\bin.
You can access Windows Services from the Windows Start menu at Start > Control Panel > Administrative Tools > Services. Select the Standard tab. Right click the Apache2 HTTP Server and then select Restart.
Edit the anyco_db.inc file. To resize the image to create a thumbnail image, add the following code before the call to $lob->savefile($imgfile) in the db_insert_thumbnail() function:
$r = oci_execute($stmt, OCI_DEFAULT);
if (!$r) {
  $e = db_error($stid, __FILE__, __LINE__);
  return false;
}

// Resize the image to a thumbnail
define('MAX_THUMBNAIL_DIMENSION', 100);
$src_img = imagecreatefromjpeg($imgfile);
list($w, $h) = getimagesize($imgfile);
if ($w > MAX_THUMBNAIL_DIMENSION || $h > MAX_THUMBNAIL_DIMENSION)
{
  $scale =  MAX_THUMBNAIL_DIMENSION / (($h > $w) ? $h : $w);
  $nw = $w * $scale;
  $nh = $h * $scale;

  $dest_img = imagecreatetruecolor($nw, $nh);
  imagecopyresampled($dest_img, $src_img, 0, 0, 0, 0, $nw, $nh, $w, $h);

  imagejpeg($dest_img, $imgfile);  // overwrite file with new thumbnail

  imagedestroy($src_img);
  imagedestroy($dest_img);
}

if (!$lob->savefile($imgfile)) {
...
The imagecreatefromjpeg() function reads the JPEG file and creates an internal representation used by subsequent GD functions. Next, new dimensions are calculated with the longest side no larger than 100 pixels. A template image with the new size is created using the imagecreatetruecolor() function. Data from the original image is sampled into it with the imagecopyresampled() function to create the thumbnail image. The thumbnail image is written back to the original file and the internal representations of the images are freed.
The existing code in the db_insert_thumbnail() function uploads the image file to the database as it did in the previous implementation.
Enter the following URL in your browser to test the changes in your application:
On Windows:
http://localhost/chap7/anyco.php
On Linux:
http://localhost/~<username>/chap7/anyco.php
In the Departments page, navigate to the Employees page by clicking Show Employees:
In the Employees page, to insert a new employee record, click Insert new employee:
Enter the new employee details or use the values shown. To browse for an employee image, click Browse:
Locate and select a JPEG image with a size larger than 100 pixels, and click Open:
In the Insert New Image page, click Save:

The Employees page shows the new uploaded JPEG image with a reduced image size, compared to the image loaded before including the image resize code:
